Red Apron

We need at least 3 days lead time to prepare your order. For urgent orders, please message us in our chatbox or call 0968 692 1198 before placing an order. Dispatch schedule is 8-10am.

Uncategorized

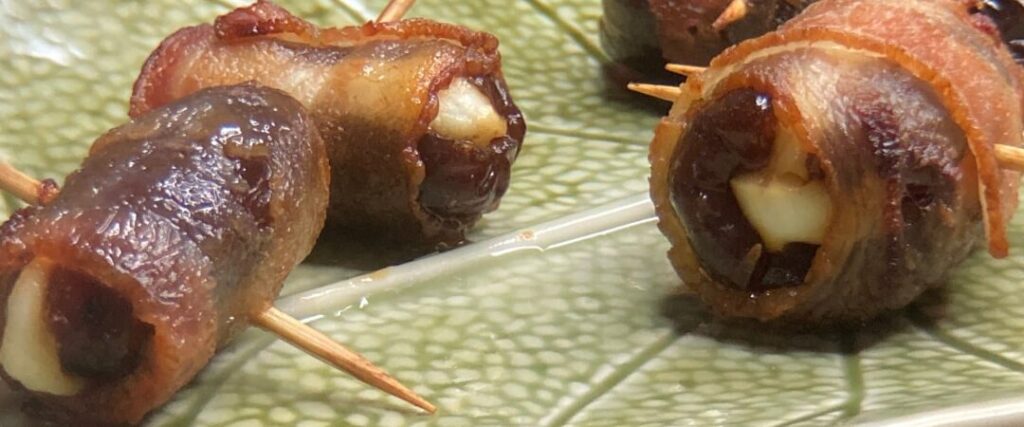
Bacon Wrapped Stuffed Dates big min 1080x450 1
Uncategorized

Bacon Wrapped Stuffed Dates

Bacon Wrapped Stuffed Dates Bacon Wrapped Stuffed Dates by Carlo | 12 Nov, 2021 One of my favorite appetizers to serve as a crowd pleaser is a goat’s cheese stuffed date wrapped in bacon. Here are some pointers to consider on the main ingredients before you start.  Cheese: I used a halloumi inspired carabao’s cheese called Magdalloumi. The cheese you choose is up to you, but I always go for a goat’s cheese if available or any creamy cheese – like kesong puti, halloumi, or in this case, a carabao’s cheese. Alternatively, you can use cheddar cheese, commercialized cream cheese, Manchego, or even blue cheese. But I find that goat cheese gives you the gooeyness we all crave, as well as a bit of acidity to cut through the fattiness of the bacon. The Magdalloumi adds a hint of saltiness and texture to the caramel-like dates once baked. Bacon: And when it comes to the bacon, the thinner the better. That will help you get the crispiness you want when they come out of the oven. You could also use thinly sliced serrano ham or prosciutto. And to those who don’t consume pork, turkey bacon is my pick. Almond: For a healthier version, you can ditch the bacon, and optionally add an almond along side with the cheese. A hazelnut, pecan, or macadamia nut all work well too. Toothpicks: Any reliable toothpick will do. An optional step to prevent it from burning up is soaking the toothpicks in water overnight (or an hour) before using in the oven or griller. Sauce: There are countless sauce to pair with this dish. Personally, I prefer enjoying it without any dipping sauce. Print Recipe PREP TIME COOK TIME TOTAL TIME 5 mins 15 mins 20 mins COURSE CUISINE SERVINGS Appetizer Mediterranean, Spanish 10 pax INGREDIENTS 8-10 strip bacon prosciutto or serrano ham 12 pcs large dates Medjool or Deglet Nour 200 g Carabao’s Milk or Goat’s Milk or any cheese of your choice as needed toothpick INSTRUCTIONS Preheat the oven to 350°F (176°C) To prepare the cheese, slice into small cubes just about the size of the dates to be used. Set aside and towel dry if needed. To pit the dates, using a pairing or any sharp knife, slice lengthwise opening it in half and remove the seeds. Carefully replace the seed with a small amount of carabao’s cheese (and an almond if using). Press the edges of the dates to seal. Wrap each date with a strip of bacon. Cut as required if too long and pierce with a toothpick to secure and seal. Wrap each date with a strip of bacon. Cut as required if too long and pierce with a toothpick to secure and seal. KEYWORD appetizer, bacon, dates, snack

ube
Uncategorized

Ube Delicacies You Can Make

Ube Delicacies You Can Make by Carlo | 1 Nov, 2021 Ube or purple yam is a tuber crop that can be white or purple in color. It is predominantly cultivated in South East Asian counties. In the Philippines, there are different kinds of ube depending on its origin according to the Philippine Department of Agriculture’s Bureau of Plant Industries: Cream White Ube – Bohol Purple Ube – Zambales Basco Ube – White Cortex with Purple Flesh Kinampay – Queen of Philippine  Ube is a cherished Filipino ingredient more popularly used to make halaya or jam. It is also used to flavor cakes, ice cream, bread, and other pastries. My fascination with ube started at a very young age. I still remember the rush I felt when I heard the bell of the local ice cream vendor. I would shout, “Ice cream!!” so my lola would know it’s time to give me 10 pesos for a cone of ube sorbetes (traditional Filipino hand churned ice cream). I also remember the times my tito made ube halaya for the holidays. My family would eat it as a dessert on its own or sometimes, on top of halo-halo. I always looked forward to the next day, knowing we’d be using it as a palaman or filling for hot pan de sal as breakfast. It pairs very well with my morning coffee. After years of watching my tito make this creamy and delicious confection, one day, I finally decided to offer my assistance in making ube halaya. I instantly regretted my decision. Eating the yummy ube halaya was one thing; making it was most definitely another matter. I only realized then the amount of effort and time required to reduce the ube mixture to form the halaya’s thick and creamy texture that we know and love. When I got to taste the result of my hard work, I forgot my initial regret and just felt happiness and accomplishment. To say that the process of cooking ube halaya is a labor of love is an understatement! Who would have thought that ube, in its ugly-looking raw form could turn into something this delicious? Just like potatoes, on its own, it doesn’t deliver much gastronomic excitement. However, when they are cooked, they are starchy and earthy with a hint of sweetness like subtle vanilla that deserves more admiration and respect. For me, ube is not just comfort food. It’s forever glazed with fond memories of home. Here’s a list of the delicacies you can create with ube (bookmark this page as I’ll keep this updated): Ube halaya Ube ice cream Ube crepe Ube ukoy Ube lumpia Ube pan de sal Ube puto Ube macapuno cake Ube cupcake Ube cheesecake Ube otap Ube pastillas Ube hopia Ube donut Ube pizza crust Ube waffles Ube pancakes Halo-halo with ube halaya Halo-halo with ube ice cream Ube cookies Blueberry Ube tarts Puto Ube Ube Lecheflan In Dubai, it’s difficult to find fresh ube tuber. Baqer Moehbi and Lulu Hypermarket are the two supermarkets that regularly supply these. Occasionally, West Zone and Al Maya has, as well. For an extended shelf life, Ube is commonly processed and sold in three forms: Bottled ube halaya – an imported product from the Philippines Liquid Ube extract – can be added to pastries to give ube’s distinct taste and color. Ube powder – pulverized dried ube, which can also be added to pastries for flavor and color. While Ube has been a popular ingredient in Filipino cuisine, it has only reached international recognition back in 2016 when it was featured as the main ingredient for the 24-karat gold Cristal donut in Brooklyn. In the Philippines, Ube is once again rising in prominence due to the popularity of the Ube Cheese Pan de Sal. It’s basically ube pan de sal filled with creamy ube halaya and cheddar cheese. I read somewhere that Ube will be one of the food trends for 2020 (assuming we all survive this pandemic). We tried our hand in recreating this Ube Cheese Pan de Sal using cream cheese instead of cheddar cheese. We also made use of tanzong for a softer pan de sal. You can find the recipe here. You may also try ube in its simplest and purest form of dessert, which is the Ube Halaya. You can find my family’s recipe here.

NoPath Copy 1080x450 1
Uncategorized

Dulce de Leche

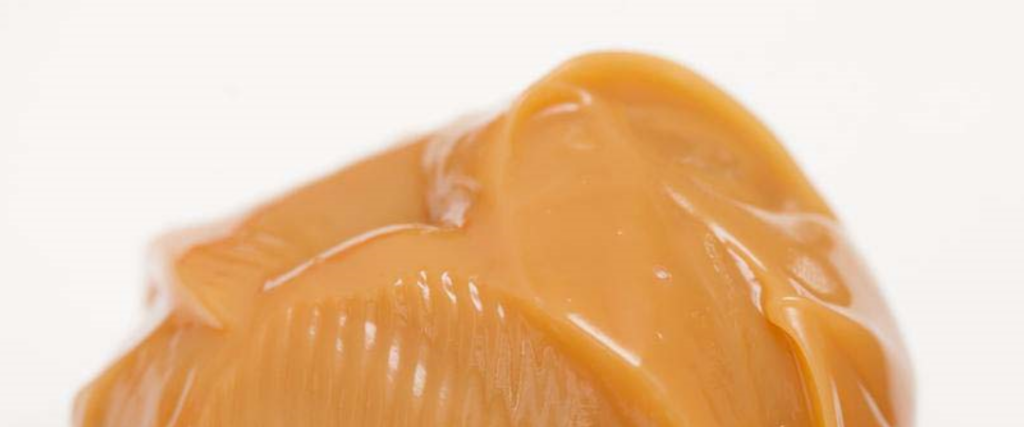
Dulce de leche is a caramel-like sauce made by heating sweetened condensed milk, different from caramel which is burnt sugar-based. It is thicker and used in various desserts. Making it involves simmering cans of condensed milk in water for four hours. Homemade dulce de leche can be stored for weeks.

Group 1 1080x450 1
Uncategorized

Banoffee Pie

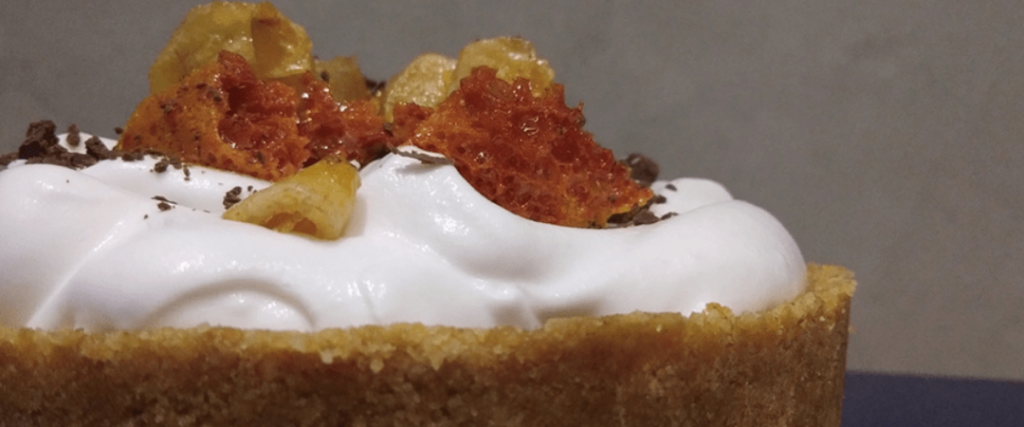
Banoffee Pie by Anjelica | 24 Aug, 2021 When I flew back to Manila for a vacation, I had planned to bake birthday cakes for my mom, my two nephews, and myself. Our birthdays are all lined up from March to May. However, a few days after my arrival in Manila, the community quarantine in NCR began and I was unable to buy the necessary ingredients. All my baking essentials were also left in another home. The cakes in my list are as follows: Frasier (for mom) Sansrival (for me) Banoffee Pie (for nephew #1) Chocolate cake with Peanut Butter Frosting (for nephew #2) Given my lack of equipment and ingredients, I couldn’t do the Frasier and the Sansrival. I could have tried to make a simpler cake for my mom but my sister suggested we try the Double Fromage Matcha Cheesecake from Dean and DeLucca. I’ve encountered that same cheesecake in Japan and I fell in love with it at first sight, then, more so at first bite. More on this cake next time. As for myself, I decided to cancel my birthday, so no cake was required. I’ll gladly turn 32 another time. On April 7th, my eldest nephew turned 13. As promised, I made him a Banoffee pie. It’s a simple dessert that does not require baking. The only special equipment you need is a pie dish or springform pan or a pan with a removable bottom. It’s easiest to make the banoffee in a pie dish because you don’t need to think about creating a leakproof crust. For this post, I’ll be detailing how to create the banoffee with a leakproof digestive biscuit crust. The Banoffee has three components: the crust, the filling, and the cream. I usually start my production with the filling by heating sweetened condensed milk to make dulce de leche. For this post, I will assume you already have the dulce ready. You may check my recipe for the dulce de leche here. The crust may be baked or not. This recipe is a no-bake recipe so, the crust is frozen to make a firm base. Alternatively, you may opt to bake the crust at 350F for 15 mins. Cool for at least an hour. Print Recipe READY IN TOTAL TIME 1 hr 15 mins 1 hr 15 mins COURSE CUISINE SERVINGS CALORIES Dessert Japanese 10 pax 450 kcal INGREDIENTS 225 g digestive biscuits, crushed 100 g butter, melted 397 g (1 can) Dulce de Leche 3 pcs large bananas, sliced 100 g easy whipping cream Chocolate shavings or cocoa powder to garnish INSTRUCTIONS Place digestive biscuits in a zip lock and crush with a rolling pin. You can also use a food processor if you have one. Transfer to a bowl and set aside. Melt butter in a sauce pan or microwave for 30 seconds Pour melted butter over digestive biscuit crumbs and mix with a spatula until evenly distributed. Transfer to an 8” pan with removable bottom. Press the crumbs onto the bottom and to the sides. For easier application, you can use a cup with straight sides. Freeze for 1 hour. After an hour, remove crust from the freezer. Push the bottom of the pan and transfer frozen crust to a plate or a round 9” cake board. Open the can of dulce de leche and pour onto the crust. Slice the bananas and layer on top of the dulce de leche. Set Aside. Whip the easy whip cream until medium peaks form. Spread on top of the bananas. Refrigerate for at least 2 hours before serving. To store, keep in the refrigerator for a maximum of 5 days. KEYWORD cakes, dessert

NoPath Copy 2 1080x450 1
Uncategorized

Ube Cheese Pandesal but Better

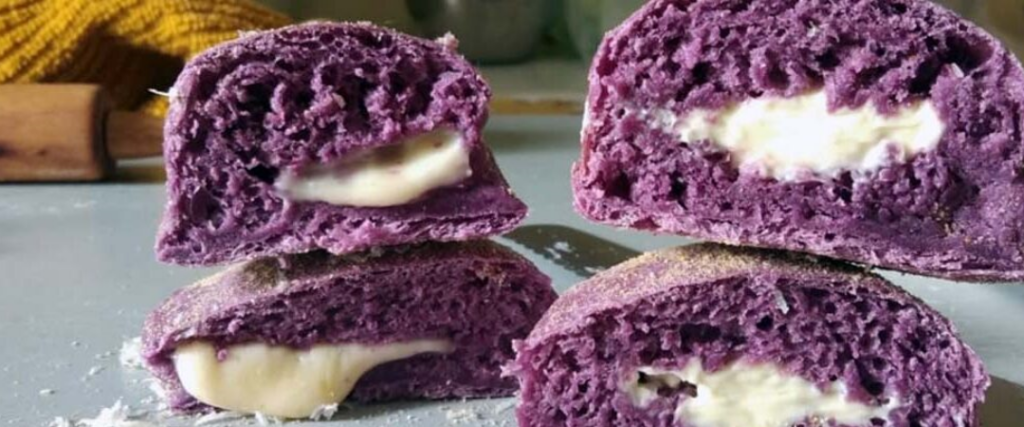
Ube Cheese Pandesal but Better by Carlo | 24 Jul, 2021 For me, ube is not just comfort food. It’s forever glazed with fond memories of home. There are so many desserts and dishes you can create with this uniquely amazing tuber as I have mentioned in my article The Best Dishes to Make with Ube. In this article, we tried our hand in recreating this Ube Cheese Pan de Sal using our ube halaya (ube jam) and cream cheese instead of soft cheddar cheese as filling. We incorporated Hanzhong for a softer and tender bread consistency. This is our Ube Cheese Pandesal but better. We added Hanzhong by making a thick paste with a small portion of the flour and liquid (water or milk). It is then chilled and mixed into the dough recipe. The purpose of adding this step is to make the bread softer while extending its shelf life and maintaining consistency. Print Recipe PREP TIME COOK TIME 5 hrs 2 hr 30 mins COURSE CUISINE SERVINGS CALORIES Dessert Japanese 20 pax 220 kcal INGREDIENTS Tanzhong 40 g bread flour 120 g milk 60 g Water Use 180g of water if milk is not available. 580 g bread flour 5 g ube powder (or 50g ube flour) 9 g active dry yeast 60 g Sugar 12 g Salt 50 g Eggs 260 g milk (90-100˚F / 32-37 ˚C) 50 g unsalted butter at room temp. 60 g bread crumbs 180 g ube halaya (9-12g portioned) 180 g cream cheese (9-12g portioned) INSTRUCTIONS Prepare your tanzhong mixture by mixing the flour (40g) and water (180g) in low to medium heat until it turns into a slurry or paste-like texture. It will only take a few minutes to reach the consistency. Set-aside and keep it chilled to be used later with the dough batter. Fit with a paddle attachment the standing mixer. In the bowl mix the active dry yeast (10g) with the lukewarm milk (260g) until completely dissolved. Add in the bread flour (580g), ube powder (5g), sugar (60g), tanzhong, and mix. Change to a dough hook attachment and add in the milk and yeast mixture until you form a rough mass. Add in the butter by small portions one at a time gradually blending it in the dough until it easily pulls away from the sides of the bowl. Form your pandesal dough into a ball and transfer to a large bowl covered with a wrap or cloth. Place in a warm room and let it rise until doubled in bulk for about 1 hour.  Punch down to deflate, roll into a bowl and let it rest for 15-20 minutes. Punch down again and cut the dough in half to work with one half at a time. Form about 18 – 20 rolls at 60g each. Fill in the rolls with cream cheese (9g) and ube halaya (9g). You can add more filling if you wish. Roll the balls in bread crumbs to coat and place on a half sheet pan (18” x 13”). Cover loosely with a cloth and let rise for 30 minutes. Preheat the oven to 400 ˚F / 205˚C. Sprinkle dough with more crumbs and transfer to the oven. Bake for 20-30 minutes or until bottom is browned. Let it cool on a wire rack or serve while steaming hot. KEYWORD cakes, dessert

NoPath 1080x450 1
Uncategorized

Ultimate Chocolate Cake

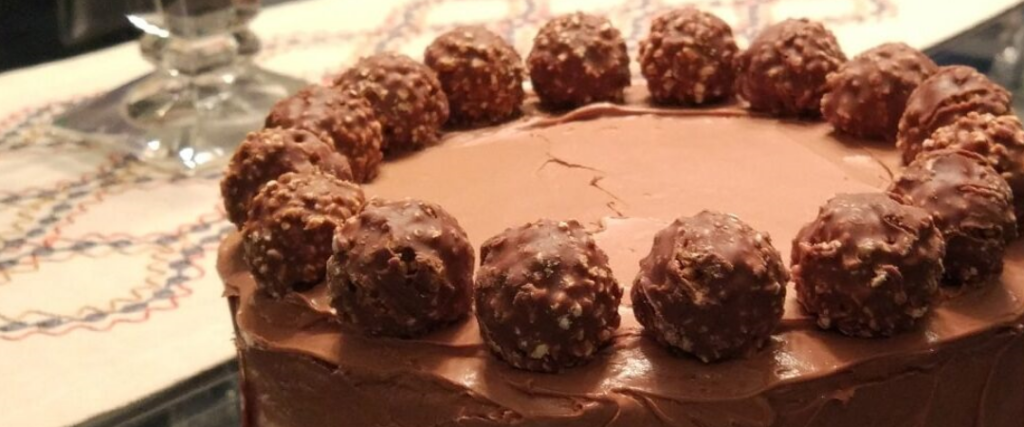
Ultimate Chocolate Cake by Anjelica | 24 Mar, 2021 Not all chocolate cakes were made equal.  For most of my life, I believed that I didn’t like chocolate cakes. I realized later that my dislike was misplaced. Turns out, I disliked chocolate sponge cakes in particular. The high ratio type was to die for. This recipe for a Horseradish Grill Chocolate Cake was the game changer for me. At first, I thought, Horseradish was a peculiar way to name a cake. Apparently, Horseradish Grill was the restaurant that had this on its menu. In baking school, we were taught that this cake was very heavy so you shouldn’t pair this with a buttercream frosting. We used whipped cream and I added a tinge of coffee flavor. I was in New York this time and my family was visiting from the Philippines. I brought this cake with me to Grand Central, where my family and I decided to have lunch. I was a bit worried that the cake would melt because whipped cream is not very stable (we used heavy cream with sugar rather than the more stable whipping creams available in the market). It was a bit melted but it didn’t matter. We devoured the cake in minutes. These days, I pair this cake with a whipped truffle ganache as frosting. A truffle ganache is one part cream and two parts chocolate. It’s a bit heavy like buttercream but applied moderately or even just a thick layer on top, it’s perfection. To make this cake, I used two (2) 9×3 cake pans but poured 2/3 onto one pan and the remaining 1/3 onto the second pan. This yielded thicker and more even layers since I only had to slice the cake with 2/3 batter in half once, as opposed to slicing twice to yield three thinner layers. This cake is very soft and moist. It sheds a lot of crumbs when you try to slice the cake in half. To eliminate the crumbs, I bake the cake at least a day before. If assembling the next day, place only in the refrigerator. If longer than a day, freeze then thaw for at least an hour to make sure it has completely defrosted. I once made the mistake of slicing a cake when it was not yet completely thawed. It was still tough in some areas. My first mistake was that I misjudged the toughness in one area and exerted more strength as I pushed the knife through. The second mistake I made was that I placed my left hand to steady the cake and it was directly on the path of the knife. I’ll save you the bloody details but I was rushed to the ER and ended up with several stitches on two fingers. Knowing this story now, maybe you’re better off just dealing with the crumbs. I’ve sliced this cake without the additional cooling in the refrigerator or freezer and it came out alright. Just a little bit more messy than usual.

Group 4 1080x450 1
Uncategorized

Is Culinary School Worth It?

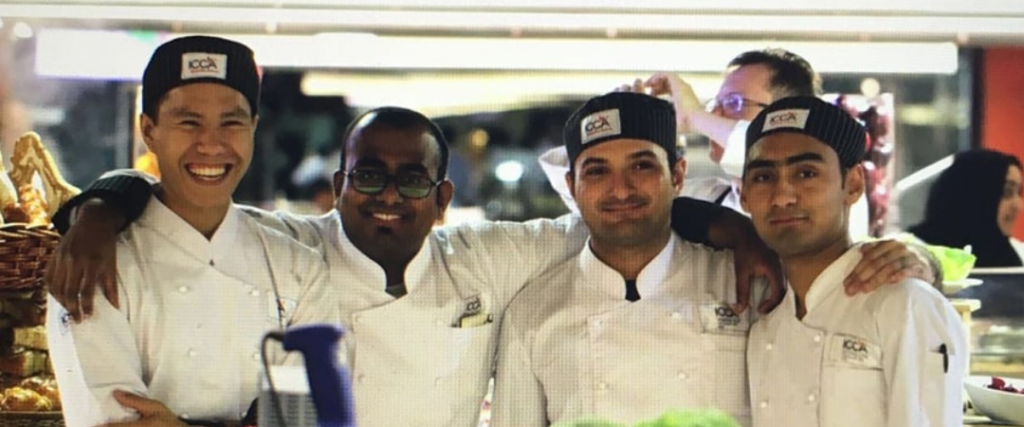
Is Culinary School Worth It? by Carlo | 18 Mar, 2021 A few months ago, I received a message from the International Centre for Culinary Arts – Dubai (ICCA), informing me that they posted my video testimonial on their Facebook page and blog. Having graduated four years ago, you can imagine my surprise upon hearing this news. Nevertheless, this got me thinking about my culinary journey so far and why I decided to acquire a diploma in Cookery and Patisserie, to begin with. Prior to being a chef and solopreneur, I was an engineer for five years with Toyota Motor Philippines. I enjoyed my work a lot and for a while, I thought my career was set to this track. One day, my mother, who was an overseas worker, fell ill. She had established a restaurant business in Dubai. With no other relatives around, I wanted to help her in any way that I can. After considerable thought, I uprooted my whole life and flew to Dubai on 2014. I wore many hats in mom’s business. I had been the driver, waiter, cashier, delivery man, social media marketer, procurement officer, dishwasher, and bookkeeper. To be honest, there were many times I questioned myself if I made the right decision in giving up my career and starting over. But still, I persisted. Although it was out of necessity and my sense of duty to my mother that prompted me to go to Dubai, I discovered my passion for food and that led me to stay. I had no formal education or professional experience in cooking or any hospitality-related field. I was only a recreational cook, inspired by my family’s inherent love for cooking. When I came to join in mom’s business, she became my sole teacher who imparted the knowledge she’d learned over the years and honed through experience. Although I could have continued to learn from her, I couldn’t fight the feeling that I was still lacking somehow. With the older cooks looking up to me as a leader, I felt the urgency to improve myself. I studied at ICCA in 2016. I didn’t go through the minor subjects you’d expect in a university. My diploma in Cookery and Patisserie was a vocational degree that operates in a lab and lecture system, where you will have hands-on cooking/baking and classroom lectures. The program was an intensive 6-month course that demanded a lot of hard physical work and time. A typical day in school was like a shift at work lasting 10 hours from 7am to 5pm. I was also working full time so right after school, I would report to duty until our shop closes at 1 am. ICCA has an amazing facility, one of the best in Dubai. I particularly appreciated that they have their own knives and tools for the students to borrow and use. Other culinary schools aren’t as generous. Having these tools provided in school was definitely a good perk considering kitchen tools cost a lot. Had I continued to learn only from my mom, my expertise would be limited to what she had specialized thus far. In school, I was exposed to different chefs with different specialties and experience. Learning from them definitely broadened my spectrum of ideas, inspiration, and knowledge. In cooking, I learned different techniques like frying, searing, rendering, sauteing, grilling, deboning, filleting, chopping, baking, boiling, etc. In patisserie, I learned all about the different cake mixing methods, cake assembly, bread and yeast raised doughs, rich doughs, classic French pastry, cream fillings, chocolates, etc. These fundamental skills and subjects are all important, like how foundations of a building in construction are or machine language is to computer programming. These fundamental skills and knowledge learned in culinary school are not always taught to you when you work in a restaurant or bakery. Most of the time, work that will be assigned to you is very specialized. For instance, a cake decorator will be assembling and decorating cakes and will not have any exposure to any bread production. An artisan pizza chef will not have the specialized skills in modeling that a cake decorator is supposed to have. Similarly, a sushi chef will not be doing any grilling. This is one of the benefits of seeking formal education in cookery or patisserie. You can be taught all the fundamentals and techniques in a short span of time, usually 3 to 6 months. For a person like me who had transitioned from another career, this short course was definitely worthwhile. In our family business, I’ve worked with many different chefs. In hiring, we don’t discriminate against applicants based on their formal education in cooking. There have been many times when we chose the hardworking one instead of the one with the culinary education. I realized that that decision wasn’t always the right one. The chef that had experience and culinary education required less supervision than the one who did not receive formal education. For a small business like ours, that can save us a lot of time. I met a lot of people in school. It was interesting to meet so many people from different walks of life. I developed good relationships with my peers, teachers, faculty, and even the cleaners. To this date, I still maintain contact with some of them and we often discuss our experiences thus far. Their perspective has kept me updated with culinary trends, vacancies, and news. In particular, I met Chef Francois, my first cooking mentor aside from mom. He gave me tips and guidance on cooking matters while he was stationed in Dubai. Sadly, he had to leave the country but we still maintain our communication once in a while. If culinary school had a con, it probably be the cost. Education is never cheap, especially one with a lot of laboratory classes. My tuition fee for cookery and patisserie was 20,000 AED each, totaling to 40,000 AED. A fresh graduate could expect a salary of 1,500 AED

Shopping Cart
Scroll to Top